How to View Incoming Documents After Archiving Sales and Purchase Quotes in MS Dynamics 365 Business Central
Introduction
Microsoft Dynamics 365 Business Central helps you manage your business documents effectively. A common challenge businesses face is accessing critical information from archived documents. A new feature of 2024 Released wave 1 of business central now lets you see incoming documents attached to your sales and purchase quotes and orders, even after they are archived. This makes finding important information easier and reduces extra work.
Business Value
When you archive documents like quotes and orders, you usually lose quick access to any attached files. The new feature in Business Central ensures that all incoming documents attached to these records remain accessible, even in their archived state. It also ensures that important attachments are always available for reference, helping with informed decision-making. This way, you can always find the information you need without going through all the old files, saving time and effort.
Requirement
Here’s how to access incoming documents from archived quotes and orders:
Prerequisites
- Ensure you are using the latest version of Microsoft Dynamics 365 Business Central.
- Make sure you have the right permission to view archived documents.
Steps to View Incoming Documents
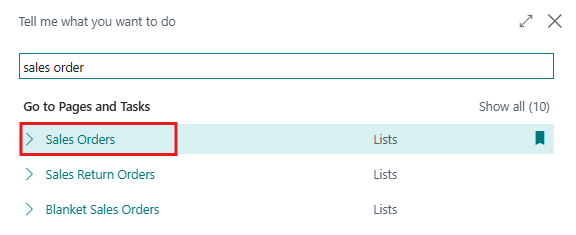
- First to attach incoming documents in purchase or sales quotes and orders Users have to go and search for Purchase or Sales Quotes and Orders into the Search icon from the top right corner and Navigate to the Page in Business Central.
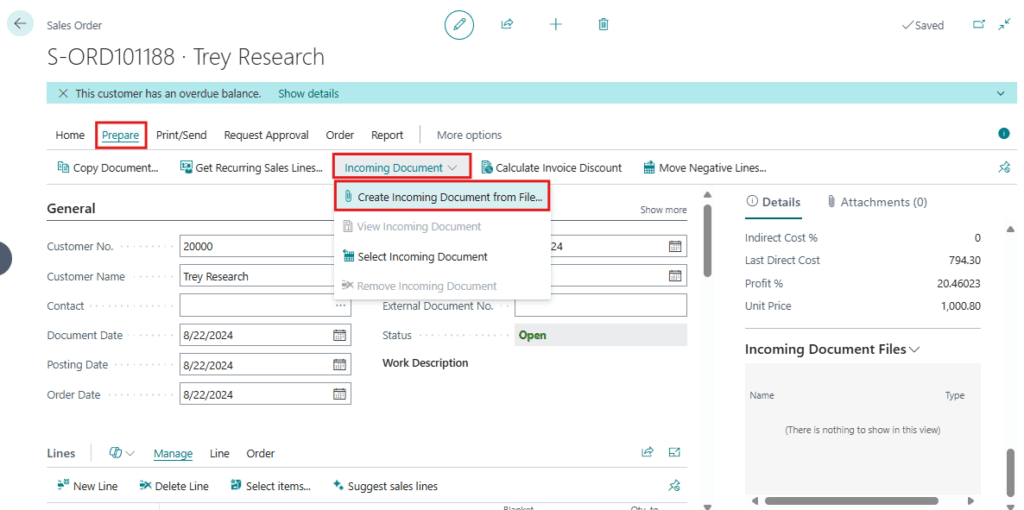
- Now open one of the Sales Order or create new Sales Order by clicking on +new option from the menu bar. Now click on Prepare > Incoming Document > Create Incoming Document from File to attach from menu bar.
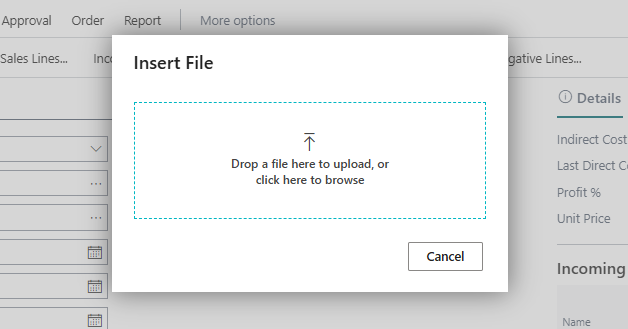
- This will ask the user to upload a file/document.
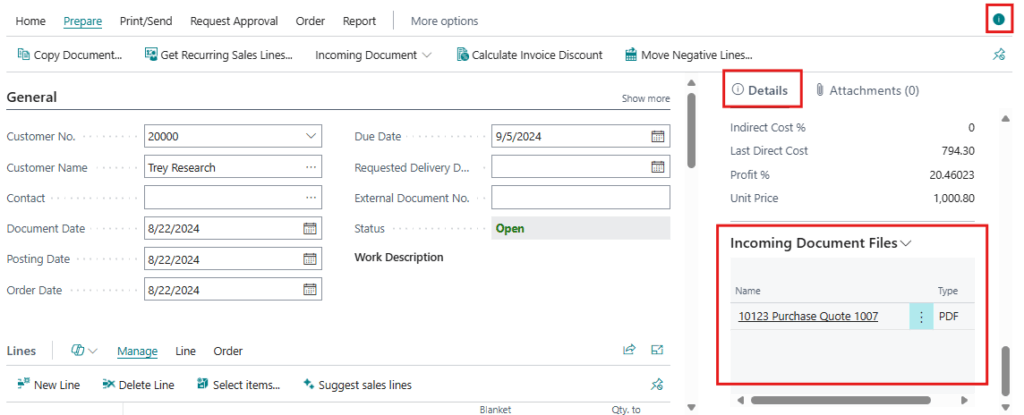
- After the user uploads the document, the document link is displayed in the Incoming Documents section under the fact box Details The user has to click on the icon to open the Fact Box and view the document link under Incoming Documents Files.
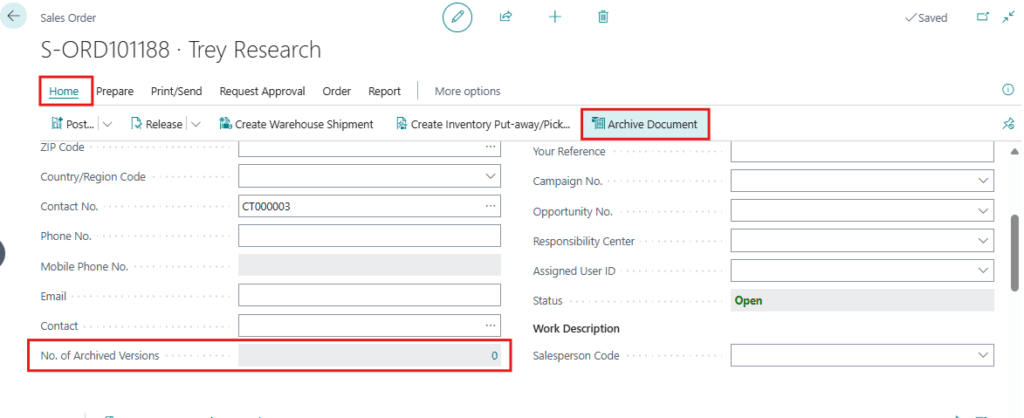
- To archive this document, the user needs to click on Home > Archive Document from the menu bar at the top. Before doing this, check the General fast tab on the Sales Order page. There is a field called of Archived Versions that shows how many times the current document has been archived. Initially, this field displays 0 versions before the archive document action is performed.
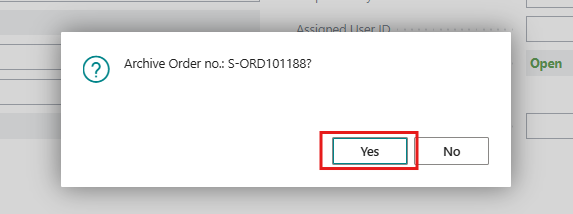
- One confirmation message box is display click on Yes button to archive document.
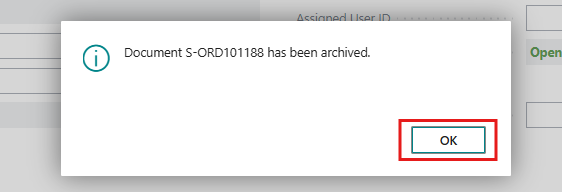
- Again, the document has been Archived successfully message box is displayed on screen click on OK
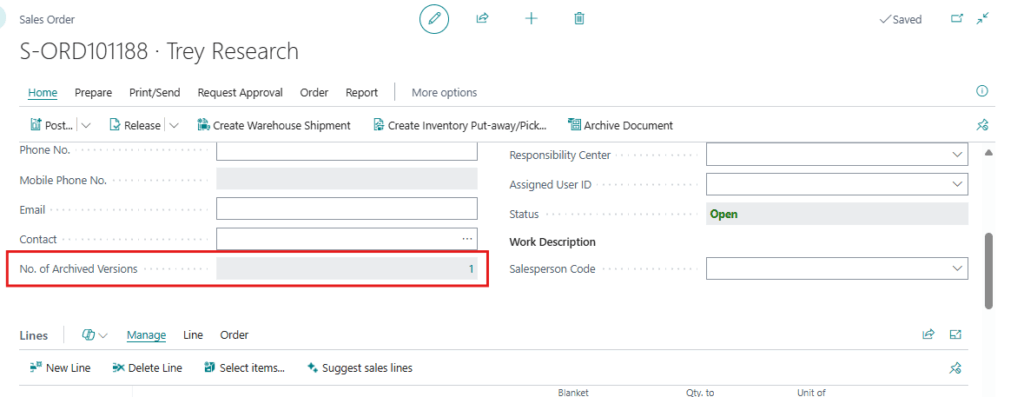
- After the user performs the Archive Document action, the document is going to be archived, and this of Archived Versions field will update to reflect the new count of archived versions from 0 to 1.
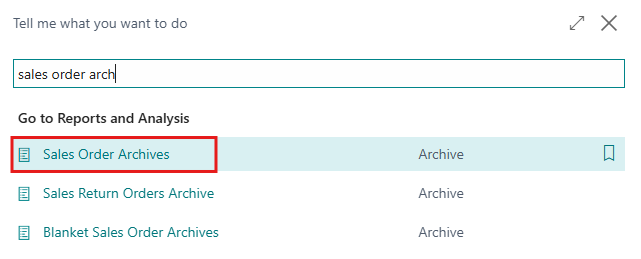
- Now Click on of Archived Versions value 1 or search for Sales Order Archives into the Search icon from the top right corner.
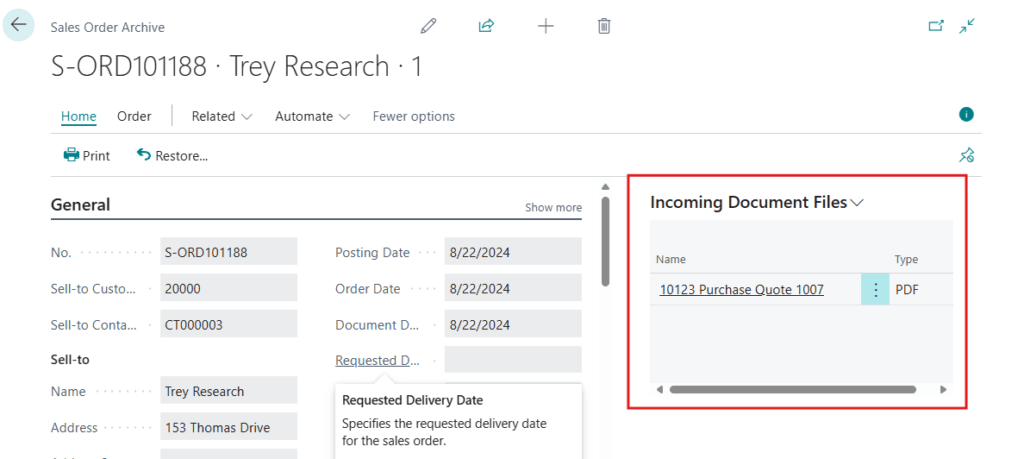
- The Sales Order Archives page will open, now open archive document where user can see the incoming document in fact box section.
Note:
If the Incoming Document Fact Box is not visible, personalize your page layout to include it by selecting the Personalize option and adding it.
- User needs to click on this icon
 on the top right corner and click on
 - On the Screen user can see click on it and now user can see incoming document files section right click on it and select Show option and click on .This will display the Incoming Document Files in the fact box.
Conclusion
With this new feature, you can easily access incoming documents even after they are archived, improving how you manage and retrieve important information. This helps you stay organized and reduces the amount of time you spend handling documents.